
The Metasploit Framework Console (MSFConsole) is a Command-Line Interface (CLI) and the primary way to interact with Metasploit. Some novice users may find it difficult to use, mainly those not used to working with CLI-driven applications.
Metasploit’s context-specific syntax can be confusing at first, so we’ve written this guide to help explain the core concepts you’ll need to understand. Once you’ve learned a few basic Metasploit Commands, you’ll be able to leverage hundreds of modules to scan systems and perform exploits.
In this article, we’ll cover:
- How to work with modules
- Configuring parameters
- Running exploits and payloads
- The PostgreSQL database
- Frequently Asked Questions (FAQ)
Let’s begin!
Navigation and Basic Commands
In this guide, we’ll be running Metasploit Framework on a Kali Linux virtual appliance since it comes pre-loaded (along with a few hundred other useful tools and utilities). Metasploit Framework can also be installed as a stand-alone application for other Linux distributions, macOS and Windows.
CompTIA PenTest+ Courses Bundle
Ace your PenTest+ exam with our CompTIA PenTest+ Courses Bundle, containing a top-rated PenTest+ prep course, a beginners penetration testing course, 3 full length practice exams, and over 500 study flashcards!
Starting the Metasploit Framework Console
You can start the Metasploit Framework Console by searching for and launching the metasploit framework app from the Applications menu (as shown in the following screenshot):

You can also start Metasploit in Kali Linux by opening a terminal console (CTRL+ALT+T) and typing sudo msfdb init && msfconsole:

We can break this command down into three basic parts:

- Firstly, the
sudocommand is used to elevate privileges - Next, the
msfdb initcommand initializes the Metasploit PostgreSQL database (used to save testing data) - Lastly, the logical “AND” operator (
&&) tells it to launch the Metasploit Framework console withmsfconsoleif the previous command was successful
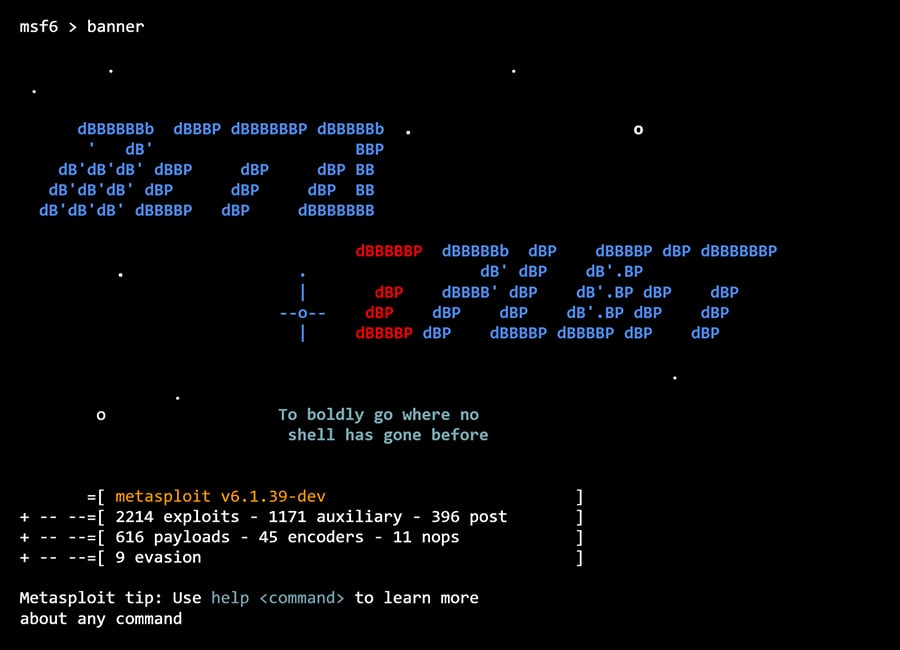
Upon launch, an ASCII art banner is displayed each time you run the MSFConsole, but you can also display a new one using the banner command:
If you’d prefer to launch MSFConsole without a banner, you do so using the -q switch:

There are several other switches available for the msfconsole command, you can use -h to display them all:

The command prompt will differ depending on the Metasploit version you’re using. In Metasploit versions 5 and 6, the MSFConsole command prompt is appended with the version number (e.g., “msf5 >” or “msf6 >”), whereas earlier versions appeared as “msf >” without the version number.
From here, you can enter commands to interact with the console.
Getting Help
The first command you should familiarize yourself with is help, which displays a list of available commands in the MSFConsole:

To learn more about a specific command, you can run help, followed by the name of the command you’d like to learn more about. E.g., help module:

Searching for Modules
There are thousands of available modules in Metasploit. You can use the search command to narrow down that list. Typing help search or search -h will display a full list of options available:

Below are some commonly used parameters:
- Name (no parameters): If you want to cast a wide net, you can simply type
searchfollowed by a keyword. e.g.,search portscan - CVE: Common Vulnerabilities and Exposures (CVE) is a list of publicly disclosed vulnerabilities for specific software applications and libraries, each given a unique identifier or CVE ID. e.g.,
search cve:2021-45046 - Type: Narrow down your search to particular module types, such as auxiliary modules (i.e., scanners) or exploit modules. e.g.,
search type:auxiliary mysql
Obtaining Information About Modules
Once you’ve identified a module you’re interested in using, you can use the info command to find out more about it:

How to Use Modules
Once you’ve selected a module, you can load it with the use command:

This appends the prompt with the module name in red.
Backing Out of Modules
You can unload a module using the back command:

Exiting MSFConsole
Using the exit command will close your connection to the MSFConsole, returning you to the terminal:

Configuring Module Parameters
Now that we’ve covered how to search for and use modules, we’re going to explain how to configure them.
Displaying Module Options
Each module has a list of parameters or options you can configure. Some of these are mandatory, and others are optional.
After loading a module with the use command, you can type options (or show options) to display a list of available parameters and their descriptions:

If you want to verify the value of a specific parameter, you can do so using the get command:

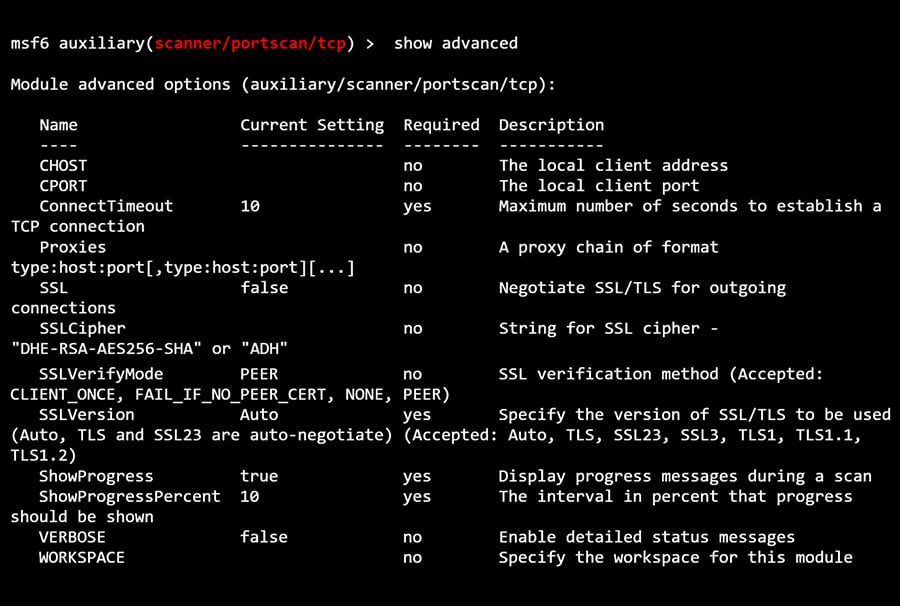
Show Advanced Options
To view any advanced options that may be available for a given module, you can use the show advanced command:
Setting Module Parameters
Before you can use a module to scan or exploit a target, it needs to be configured for your specific use case. You can use the set command to update the value of a parameter:

We know from its parameter description that “RHOSTS” represents the remote (read: target) host’s IP (192.168.5.122 in my test lab). You can override the value of any previously set parameter value by running the set command again or by using the unset command to clear it:

Setting Global Variables
You’ll notice that some parameters, such as RHOSTS appear over and over again across multiple modules. Rather than repeatedly entering the RHOSTS value for each new module we load, we can use the setg (as in, “set global”) command:

In the example above, we set the RHOSTS global value to “192.168.5.122”, loaded a new module, and checked the value of RHOSTS using the get command. The output verified that it was already configured to our custom value.
Running Modules and Exploits
Once you’ve configured all parameters marked as “required” for the module you’ve loaded, you can execute it using either the run or exploit command:

After running an exploit, the results will be displayed, letting you know whether the module ran successfully or not.
CompTIA PenTest+ Voucher
Launch your pentesting career with a discounted CompTIA PenTest+ Voucher. Save up to 30% and earn your certification with an authorized CompTIA partner.
Searching for Payloads
Some exploits require a payload (additional code used to interact with the target). You can use the show payloads command to view the available payloads for your exploit module:

Selecting a Payload
You can select a payload by using the set payload command, using either its name or number:

In the example above, we’ve configured the exploit to open a reverse perl shell on the target after compromising a known vulnerability on that target’s FTP server.
Useful Database Commands
As mentioned previously in this guide, Metasploit supports using a PostgreSQL database to store information captured during a penetration testing session.
Note: You can run the Metasploit Framework Console without being connected to a database. However, some commands that require a database running (e.g., db_nmap) won’t be usable.
Checking the Database Status
The db_status command will display whether or not the Metasploit database is running:

Importing and Exporting Data
At some point, you’ll want to get data into and out of the Metasploit database. Some examples of data you might want to work with in Metasploit include network scan results (e.g., Nmap) and vulnerability assessments (e.g., Nessus, OpenVAS).
You can use the db_import command to import data into your Metasploit Database and db_export to export data. For syntax and a full list of support file types, you can use the -h switch (i.e., db_import -h).
Using Nmap in Conjunction With Your Metasploit Database
Metasploit can run Nmap against targets and save the results to the database. Simply run db_nmap followed by any [Nmap] switches you’d like to use:

You can also dive deep into Kali Linux and Penetration Testing with our Ethical Hacking Course Bundle. Just click the banner below to start your hacking journey.
The Ethical Hacking Courses Bundle: Learn Hacking for Beginners includes:
- Learn Hacking From Scratch: Ethical Hacking Course
- Pentesting and Website Hacking Course: Learn From Scratch
- How to Hack WiFi and Wired Networks: Beginner's Course
- Learn Social Engineering Testing From Scratch
- Cloud Hacking: How to Do Penetration Testing Using the Cloud


